A design map is a visual tool that shows you exactly how a user moves through your product. It captures what they do, what they feel, and where problems might appear. Think of it as a GPS for your design process: it shows you the route from start to finish and highlights where your users might get lost.
When you create design maps early in your project, you build a shared vision of the user's experience across your entire team, from designers and developers to stakeholders. This saves you from expensive late-stage fixes.
In this video, William Hudson, User Experience Strategist and Founder of Syntagm Ltd, explains how you can use design maps to align user needs, system constraints, and implementation decisions in one clear framework.
Why Design Maps Guide You to Better User Experiences
Tamara Adlin and John Pruitt created design maps as part of their Persona Lifecycle methodology in 2006. They saw teams struggle to organize collaborative design sessions and built a simple system that anyone could use, regardless of discipline or role.
Design maps solve a problem most product teams struggle with: How do you move from user understanding to solution creation while you keep everyone on the same page?
The answer lies in their visual simplicity and collaborative structure. Design maps bridge the gap between the "who" (your personas) and the "how" (your designs). They transform abstract user research into concrete design directions while they keep creative possibilities open.
Without design maps, your team discovers misalignment when it's already too late:
You design a screen based on one interpretation of user needs. Your developer builds a feature based on a different understanding. Your product management team expects something else entirely. The team only discovers these disconnects during implementation, when fixes consume weeks of work and delay launches. Design maps prevent this waste.
How Design Maps Work to Provide User Clarity to Designers
Design maps started as physical sticky note sessions on walls or large sheets of paper. Teams gather around, add colorful notes, move them around, and build the user's journey together. The color system makes it simple: blue for steps, pink for ideas, yellow for questions, and green for context.
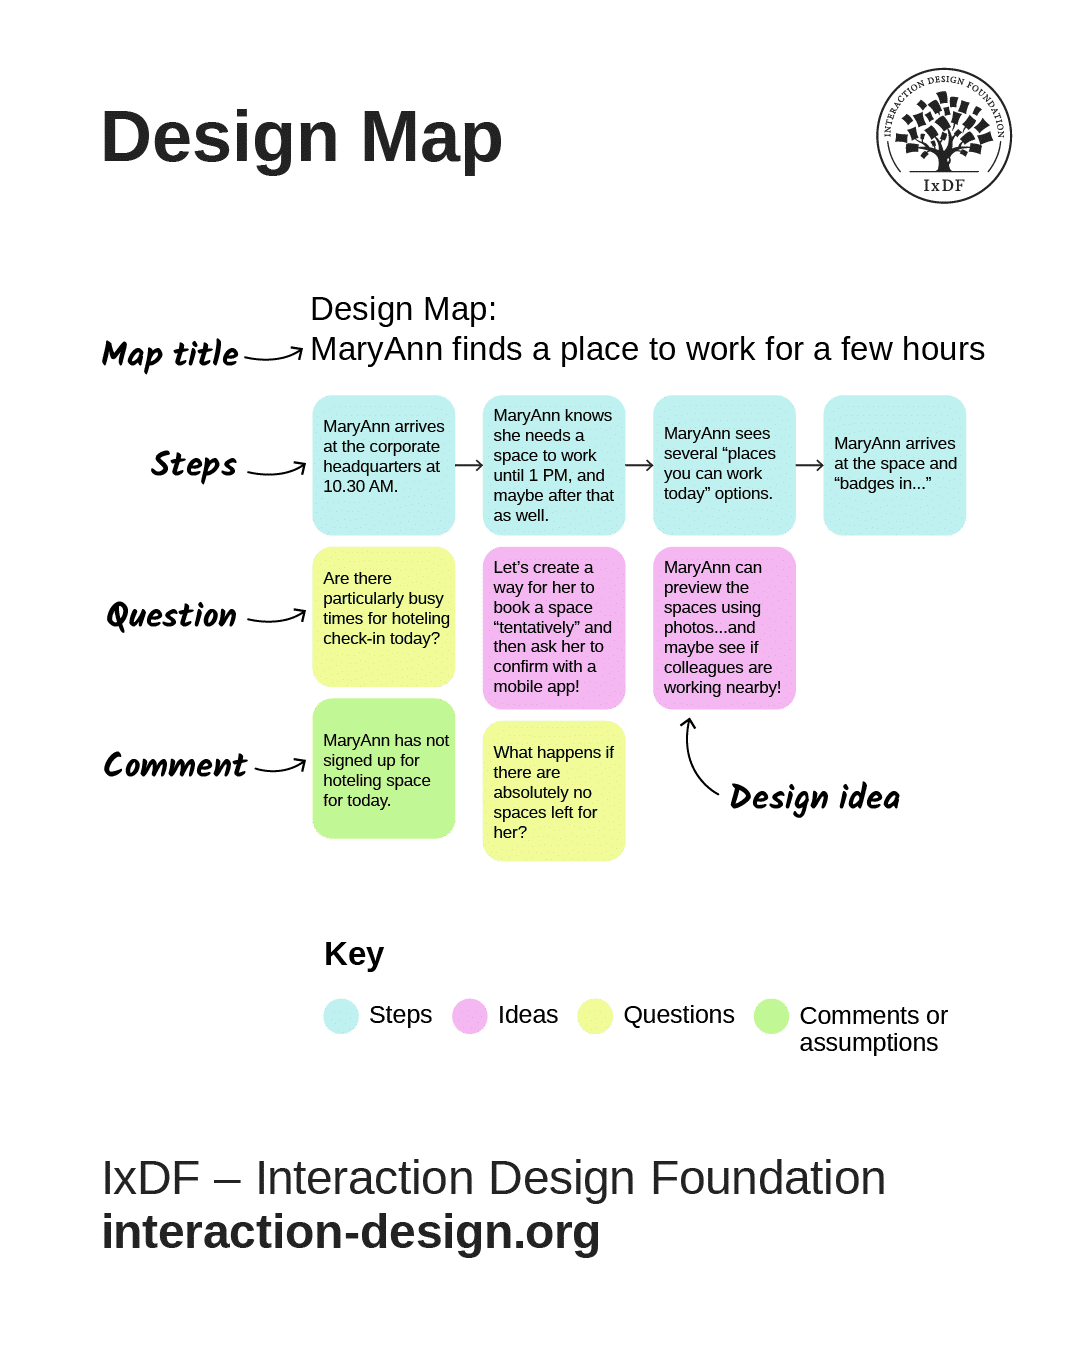
Design maps are a collaborative visual tool that combines stories of use with comments, questions and ideas from the project team.
© Interaction Design Foundation, CC BY-SA 4.0
You can create design maps physically with sticky notes or digitally with tools like Figma, Miro, or FigJam. Every design map includes:
A title, which includes the persona name and the specific goal. Example: "Design Map: Maya schedules a team meeting."
Steps (blue) show what users do in sequence, from left to right. Keep them conceptual: "Opens calendar" and "Checks availability" work. "Clicks the blue button in the top right" is too detailed.
Questions (yellow) capture uncertainties you can't resolve immediately. Write the question down and keep moving. You'll address these through research or testing later.
Comments (green) explain context: "Mobile users struggle here" or "Users often forget passwords at this step." They help your team understand the why behind each action.
Design ideas (pink) record every solution your team suggests. Even ideas you don't implement immediately often prove valuable later.
This organized system does three things:
it lets you manage complex discussions without drowning in details, it enables quick visual scans of how the map evolves, and it creates a shared language across different team members and stakeholders.
In this video, William demonstrates how to assemble all the basic elements of a design map and how you can use it to align your team and create user-centered results.
Now that you understand the system, you can run your own session. Plan for 60–90 minutes for your first design map session. Schedule follow-up time to address questions or complexities that surface. This helps keep you and your team focused and productive.
Step By Step: Create a Design Map That Delivers Results
The ideal time to use design maps after you develop solid personas because you need to understand your users first (through research and persona development). Then, you can use design maps to explore how those users interact with your proposed solution. Once you finish this process, you can move into more detailed design work like prototypes.
This ensures you think through user flows before you commit to specific interface solutions, which saves you from the need to redesign screens that don't support the user's actual needs.
You can follow along with our free, easy-to-use guide designed to help you build design maps, which includes a full-page example map, a fillable map for practice, and simple stories of use.
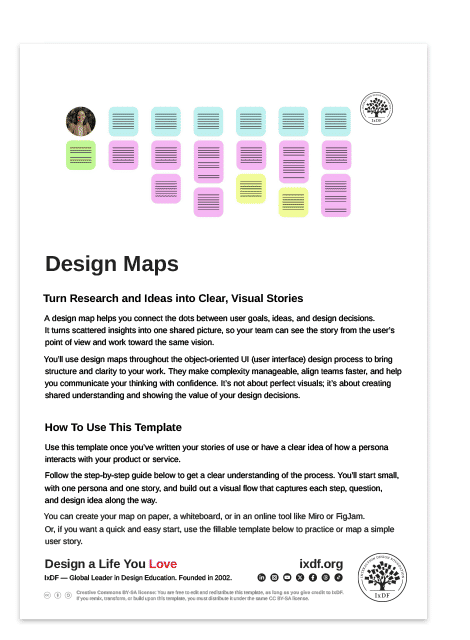
Here’s how to get started.
Step 1: Gather Your Map Team
You need participants from varied roles. Include people from design, development, product management, and other functions that influence the product. This diversity of perspective strengthens the final result.
Assign one person as the workshop facilitator to guide the session, manage time, and ensure the process stays on track.
Step 2: Choose a Single Focus
Start with one persona and one goal. Don't try to map multiple personas or multiple goals in the same session. This focus keeps the work manageable and ensures you can explore the experience in enough depth to generate useful insights.
Frame the central question: What might it feel like for this specific persona to use our new product to achieve this specific goal?
In this video, discover why designing for one specific individual (rather than trying to serve everyone) leads to better solutions for your entire user base.
Step 3: Map the User's Steps
Work from left to right, and capture the sequence of actions the user takes. Use blue sticky notes for steps. The facilitator must balance detail with momentum. Encourage participants to describe processes without excessive depth (you don't need separate sticky notes for every form field).
But don't oversimplify either. Complex processes shouldn't collapse if they involve more nuance.
Here are some example steps:
Mary arrives at the corporate headquarters at 10:30 AM.
Mary knows she needs a space to work until 1 PM, and maybe after that as well.
Mary sees several “places you can work today” options.
Mary arrives at the space and “badges in…”
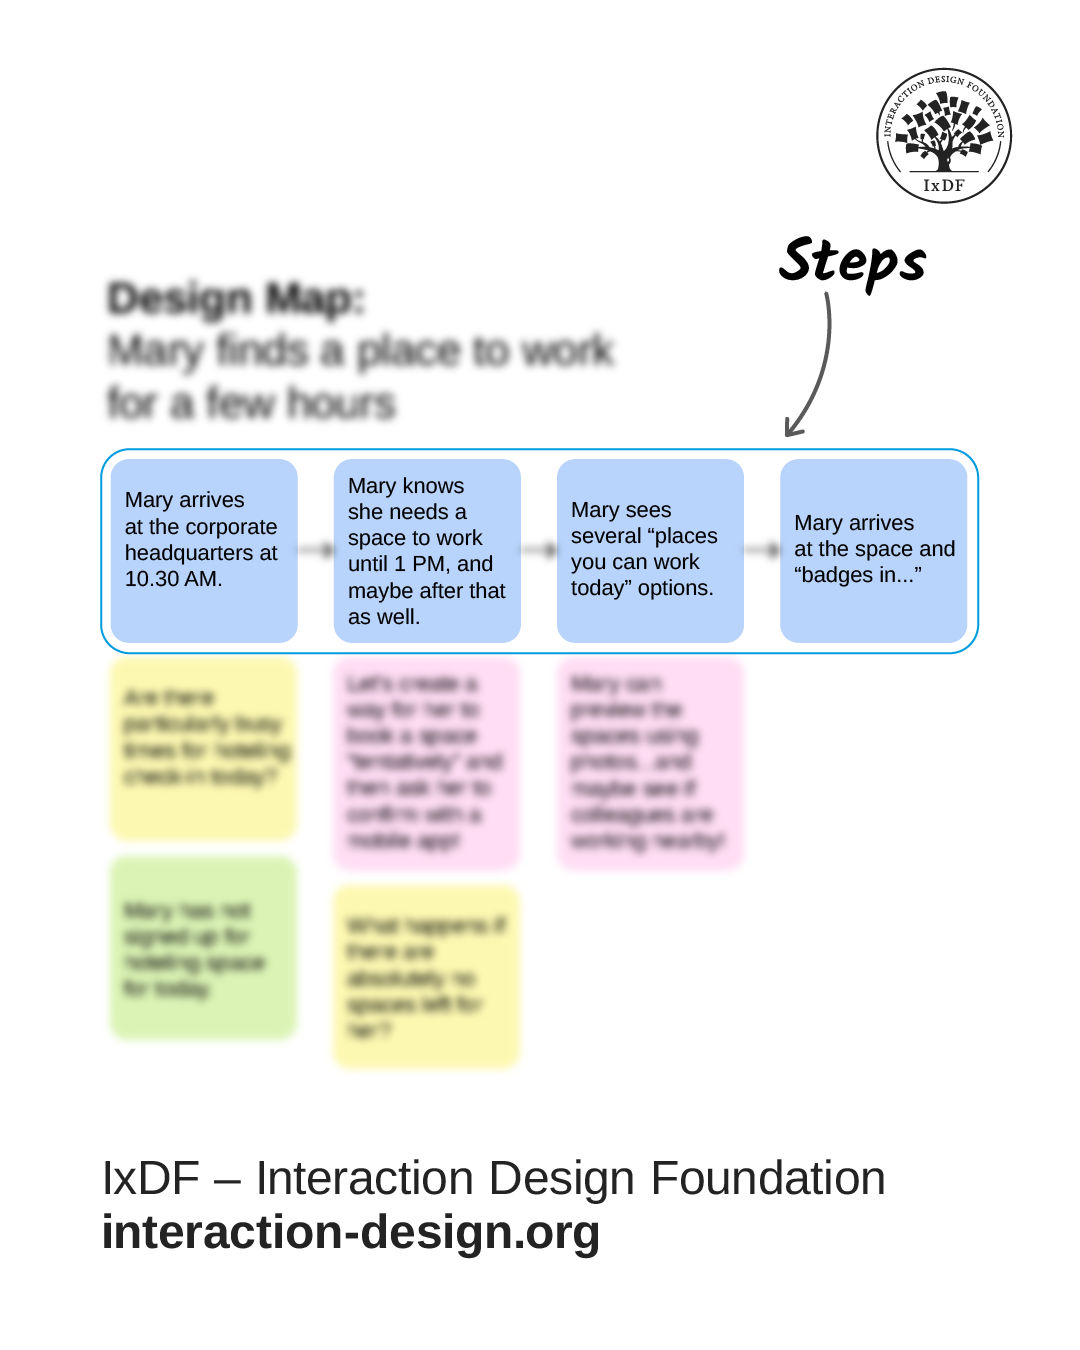
Blue sticky notes arranged left to right show the user's step-by-step journey through the experience.
© Interaction Design Foundation, CC BY-SA 4.0
Step 4: Add Layers of Insight
As you establish the step sequence, add the other elements.
Record comments in green below the steps they reference. These provide context and considerations.
Capture questions in yellow when uncertainties arise, but don't let debates derail the session. Record the question and move forward.
Note design ideas in pink as possibilities emerge from discussion.
The structure allows you to read across rows to follow the complete process, or read down columns to explore specific moments in greater detail.
Here are some examples:
Question: Are there particularly busy times for hoteling check-in today?
Question: What happens if there are absolutely no spaces left for her?
Design idea: Let’s create a way for her to get to book a space “tentatively” and then ask her to confirm with a mobile app.
Comment: Mary has not signed up for a hoteling space today.
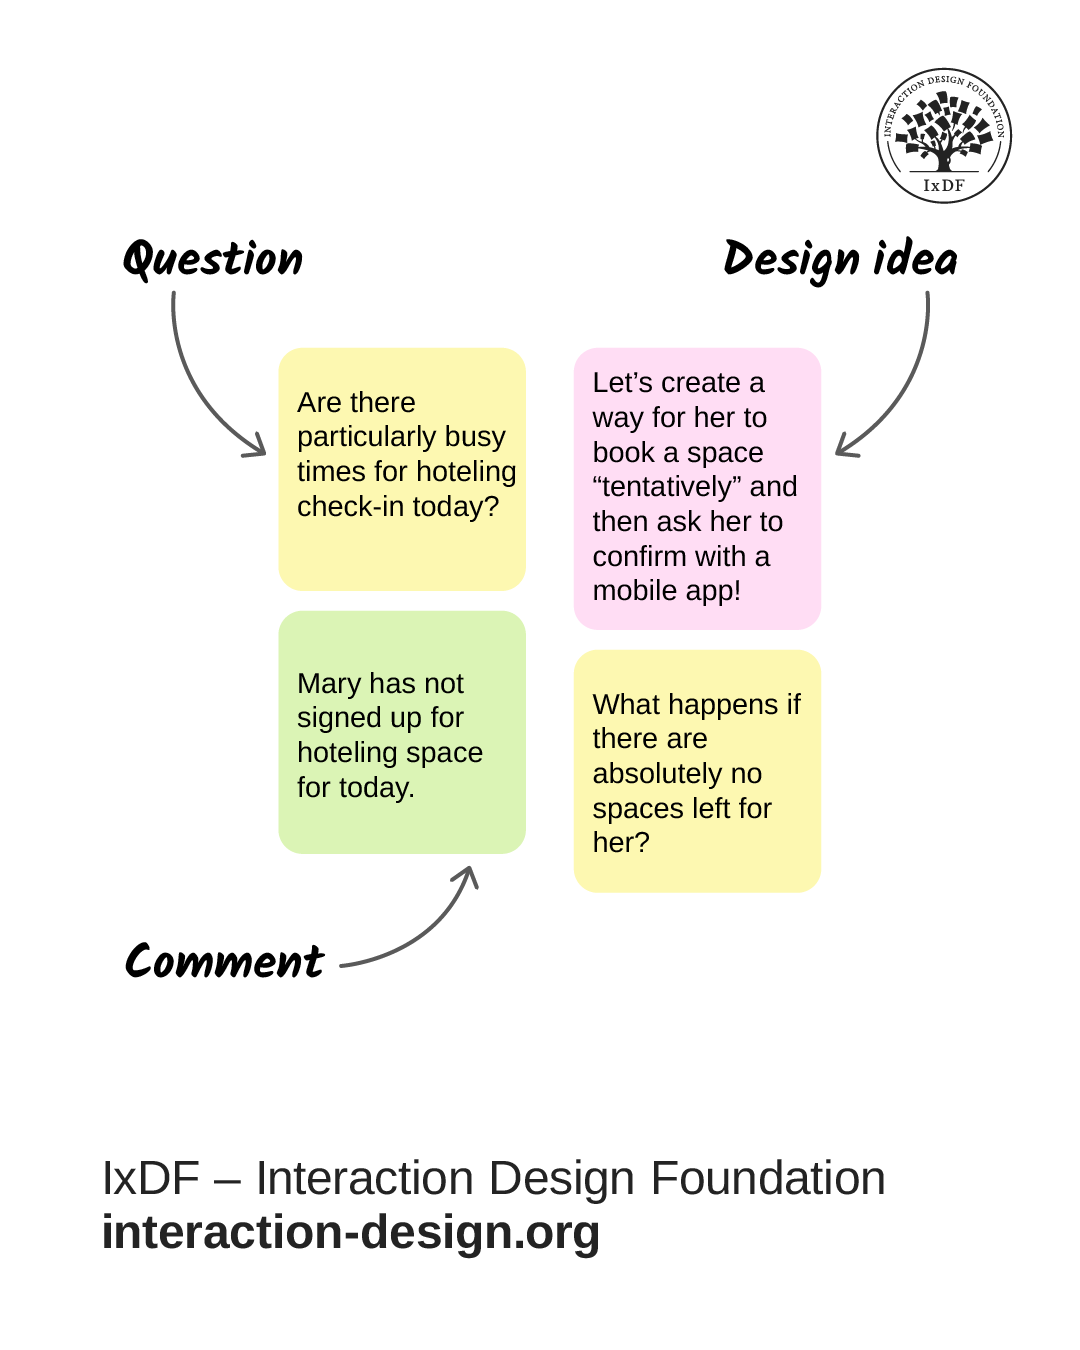
Pink, yellow, and green notes add ideas, questions, and context below each step in the user's journey.
© Interaction Design Foundation, CC BY-SA 4.0
Step 5: Iterate to Deepen Understanding
Design maps help you think, and they change as your understanding grows. As you learn more and discuss implications, you'll modify elements throughout the map. Maps become more complex and detailed as your understanding deepens. This signals progress, not problems.
You'll typically see fewer yellow question notes as uncertainties transform into steps, comments, or ideas. When you change comments as you iterate, review everything "downstream" (to the right) of that change to assess ripple effects and ensure consistency.
Benefits of Design Maps for You and Your Team
Design maps turn the hours you invest in research, discussions, and planning into a shared understanding that everyone on your team can see and act on. Here's what they deliver:
They create alignment across your team. When designers, developers, product managers, and stakeholders look at the same map, they see the same user reality. This shared understanding prevents miscommunication and reduces the back-and-forth that slows projects down.
They simplify complexity. Design maps use a simple color-coded system that anyone can understand, regardless of their discipline. You don't need special training to contribute or to grasp what the map shows.
They reveal opportunities and problems early. When you map the experience before you build anything, you spot friction points, missing steps, and design opportunities when they're easy and cheap to fix.
They keep you focused on user goals. It's easy to get distracted by technical constraints or stakeholder requests. Design maps anchor every discussion back to what the user needs to accomplish.
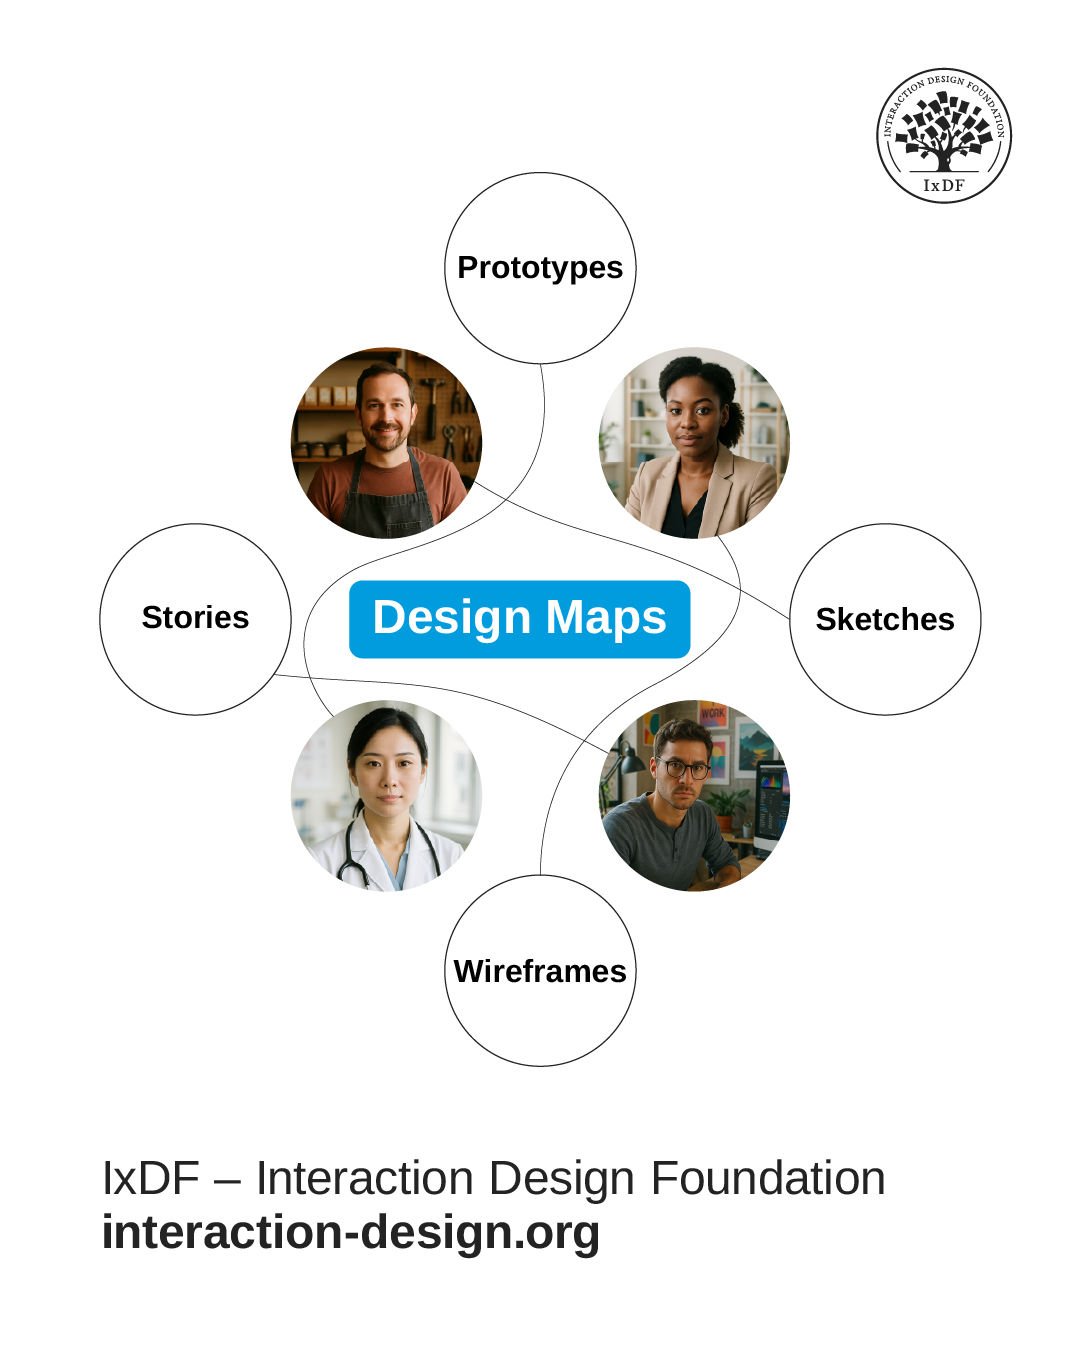
Design maps link personas to the core design questions and artifacts shaped in the research process. They unify our stories, sketches, wireframes, and prototypes into one coherent view of the system.
© Interaction Design Foundation, CC BY-SA 4.0
When Design Maps Help (and When They Don't)
Design maps aren't a universal solution, but they excel in certain scenarios. Here's when they deliver the most impact.
Explore new products or features before you build them. Catch problems with sticky notes instead of after you've written code. A session might reveal your checkout flow confuses users or that you've missed a critical step.
Align teams around a shared vision. When designers, developers, product managers, and stakeholders work on the same map, everyone builds the same mental model. The map becomes your single source of truth.
Compare different approaches. Create three maps that show three ways your persona completes a task. Lay them side by side. The comparison reveals strengths and weaknesses before you commit to a direction.
Turn research into action. Design maps pull your persona documents off the shelf and put them to work. They transform what you know about users into decisions about what you'll build.
Design maps can't solve every problem. Avoid them in these situations and choose a more appropriate approach instead.
Your personas need more work. Design maps require solid personas with clear goals and behaviors. Without that foundation, your mapping session drifts. Strengthen your research first.
You need detailed interface specs. Because design maps work at a conceptual level, they won't tell you button colors, form layouts, or element placement. Switch to wireframes or mockups instead, and then attach these to your maps for clarity and completeness.
You want to document what exists now. Design maps explore future possibilities. To capture current processes, use tools like reality maps instead.
Your project is already in late stages. Create design maps early when they can still influence your direction.
Design Better Experiences Through Collaboration
Design maps give you a visual language to explore how users will experience your product before you invest time and resources in development. The color-coded sticky note system makes complex discussions manageable. The collaborative process aligns your team around a shared understanding of user needs. The iterative approach helps you refine ideas and spot problems early.
The next time you start a new feature or product, follow these three steps:
Gather your team and choose one persona with one clear goal.
Grab sticky notes (or open Figma, Miro, or FigJam) and map the user's journey from start to finish.
Use the color system to capture steps, questions, comments, and ideas as you work.
You'll spot misalignment before it costs you weeks of rework. You'll discover friction points when they're easy to fix. You'll generate solutions you wouldn't find alone. Most importantly, your team will build based on a shared mental model.
Design maps turn research into decisions, conversations into clarity, and ideas into products that work for real people. Start your next project with a map, and your users will thank you for it.