Feedback Capture Grids

Your constantly-updated definition of Feedback Capture Grids and collection of videos and articles.
Be a conversation starter: Share this page and inspire others!

105 Shares
Save

Get 1 Powerful Email Each Week

Join 313,908 subscribers.

What are Feedback Capture Grids?

Feedback capture grids are simple tools that help you collect, sort, and act on feedback from users and stakeholders, essential in UX (user experience) design. By organizing comments into clear categories like Likes, Criticisms, Questions, and Ideas, you can spot patterns quickly, prioritize improvements, and create better user experiences with confidence.

In this video, William Hudson, User Experience Strategist and Founder of Syntagm Ltd., explains how early-design methods like tree testing and first-click testing help you gather focused, quantitative feedback that complements tools such as Feedback Capture Grids.

Transcript

Why You Should Use a Feedback Capture Grid

Whenever you work on design solutions such as digital products and put them in front of others, feedback comes in fast. From proposed ideas about designs to early versions of apps and websites, you’ll get feedback from users, team members, and stakeholders and have the chance to harvest potentially rich and varied insights. However, without a clear system to do so, you may run into a problem; valuable insights often get lost in meeting notes, scattered stickies, or unread comment threads. Before you might start feeling disheartened, you’ve got a handy tool to rely on, as a feedback capture grid changes that.

The benefits of a feedback capture grid are that it gives you a structured way to collect and review feedback so you can:

Make Sense of Messy Input

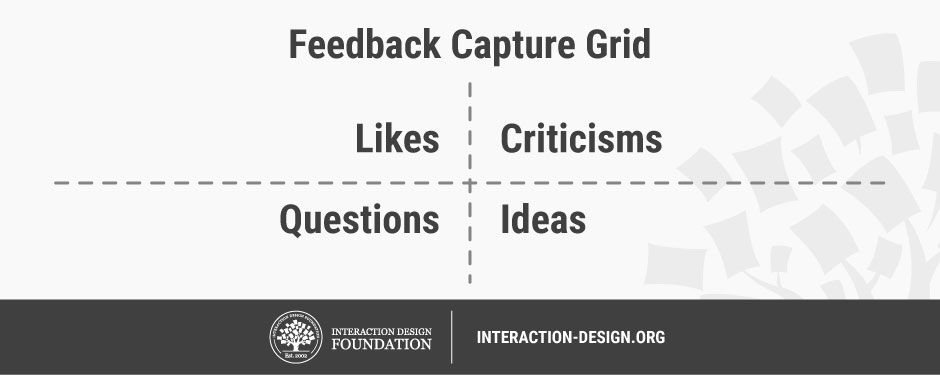
You organize raw feedback into four clear categories, commonly used in a feedback capture grid:

  • Likes are what users or stakeholders appreciated or thought worked well.

  • Criticisms are what they disliked, found frustrating, or thought didn’t work.

  • Questions are what they found confusing or were unsure about.

  • Ideas are any suggestions for improvement, feature requests, or new approaches.

When you put feedback “items” into these categories, you’ll find it will help you chart all that feedback sensibly, balance positive and negative input, and focus on what matters most.

Spot Patterns and Themes

In a typical feedback-capturing grid, you’ll notice repeated issues and common suggestions at a glance, and here are some examples that might come up:

In the “Likes” Quadrant

You may find consistent praise for a specific feature such as, “Everyone loved the drag-and-drop tool,” or repeated mention of smooth onboarding, such as, “Users found the sign-up flow easy and intuitive.” Visual design appreciation may appear, too, such as, “Multiple users commented on the clean layout or color scheme.”

In the “Criticisms” Quadrant

It’s where recurring usability issues go, such as, “Several users struggled to find the search bar.” Frustration with navigation is another example for this quadrant, such as, “Confusion around where to go next after completing a task.” The same goes for bugs or performance issues, such as, “The app froze on the same screen for multiple testers.”

In the “Questions” Quadrant

Queries regarding confusion about system behavior go in here, such as, “Why does the app log me out after 10 minutes?” Unclear language or terminology can feature, too, such as, “What does ‘workspace’ mean in this context?” Another area that tends to arise is uncertainty around data privacy or outcomes, such as, “What happens to my data after I submit this form?”

In the “Ideas” Quadrant

Creative aspects such as requests for customization go in this quadrant, like, “Could I rearrange the dashboard widgets?” Suggestions for new features can crop up, too, such as, “I’d love a dark mode option!” Look out for workflow improvement ideas, such as, “What if the system remembered my last filter settings?” too.

Cross-Quadrant Themes (Patterns that Span Categories)

Sometimes feedback comes in a little mixed. For instance, a praised feature can still cause confusion, such as, “Users love the visual dashboard but ask a lot of questions about what the graphs mean.” Or you might have multiple ideas pointing to the same underlying need, such as, “Requests for filters, tagging, and folders all point to a need for better content organization.” Or there might be a mismatch between expectations and experience: such as, “Users expected autosave, but the system makes them save manually, which causes a lot of frustration.”

Spotting these kinds of patterns helps you prioritize improvements based on frequency, severity, and impact. It ensures you’re going after and solving real user problems, too, not just reacting to individual comments.

A feedback capture grid with the 4 categories shown.

© Interaction Design Foundation, CC BY-SA 4.0

Act on Real Insights

You can move quickly from “what they said” to “what we’ll do” and make the most of effective user research. Although this tends to take careful judgment and collaboration, the capture grid for feedback offers a powerful benefit. It’s like having a clear “runway” to take off from as you launch at each problem with a strong sense of direction. Plus, it can help safeguard you and your design team from assumptions taking your design down the wrong avenues.

In this video, William Hudson explains how user research gives you the actionable insights you need to move from assumptions to evidence-based design decisions.

Transcript

Keep Teams Aligned

Feedback grids that capture excellent insights help everyone share the same view of what’s working and what needs fixing. When you set feedback out clearly, the grid becomes an excellent reference point and UX deliverable to show you know what you’re doing and what needs doing.

Build a User-Centered Culture

From a higher perspective, you’ll have proof where you can show that feedback leads to real change. That can become a powerful tool to present to stakeholders and (with clients’ and users’ consent) future employers.

The benefits extend in many directions, whether you’re running usability tests, gathering stakeholder input, or wrapping up a design sprint. The feedback capture grid helps you find important signals that might otherwise get lost in “feedback noise,” determine next steps, and take decisive action on design improvements or things to cut out. This layout works well in workshops, interviews, usability tests, and sprint reviews. It keeps feedback balanced and visible, and helps you make better decisions, faster. You can use it with sticky notes on a wall or digitally in tools.

In this video, Ann Blandford, Professor of Human-Computer Interaction at University College London, explains how semi-structured interviews reveal the reasons behind user behavior while highlighting why they cannot replace direct observation when you need reliable evidence for action.

Transcript

When to Use a Feedback Capture Grid

The grid is flexible and lightweight, making it one of the most adaptable tools in your UX toolkit, and you can use a feedback capture grid at any stage of the UX design process where you need to capture input, review it, and act on it. Its common use cases include:

  • Usability testing, when you’re documenting user reactions, pain points, and suggestions in real time.

  • Stakeholder feedback, when you capture and clarify feedback after a design review.

In this video, Morgane Peng, Managing Director and Global Head of Product Design and AI Transformation at Societe Generale CIB, explains how common stakeholder comments reveal misunderstandings about design and why clear, structured feedback helps you refocus conversations on usability and real problems.

Transcript

  • Retrospectives, when you reflect on what went well and what should improve next time.

  • Customer interviews, when you want to sort insights into actionable categories for follow-up.

  • Workshops and sprints, where you’ll want to organize group ideas quickly and democratically.

In this video, David Bill, Interaction Designer who led service design for five U.S. federal agencies at Booz Allen Hamilton before driving innovative design solutions as a Senior UX Designer at Amazon Web Services (AWS), explains how well-structured workshops help you gather diverse input quickly and turn group ideas into actionable direction.

Transcript

How to Use a Feedback Capture Grid: A Step-by-Step Guide

Follow these steps to set up and use a feedback capture grid in your next session.

Step 1: Set a Clear Goal

Before you begin, ask yourself, “What am I trying to learn or improve?” and “Who is giving feedback, and why?” For example: “I want to test whether users can complete checkout in under two minutes.” A clear goal helps you filter what’s relevant.

Step 2: Choose Your Format

Depending on your setup, pick the format that works best. If it’s in-person, use a whiteboard and sticky notes. Remote calls for effective digital tools. In any case, you’ll want to create a simple 2x2 grid with each quadrant labeled: Likes, Criticisms, Questions, and Ideas.

Step 3: Capture Feedback Live

As users interact with your product in usability testing sessions for, for example, prototypes or when stakeholders review your work:

  • Write one point per sticky note or card.

  • Be specific. Use direct quotes whenever possible.

  • Place each note in the appropriate quadrant.

So, instead of writing, “User liked the homepage and checkout process, but had issues with the cart icon and didn’t understand the shipping timeline,” you’d break it into individual points such as: “Liked the homepage design,” “Found checkout flow smooth,” “Cart icon was hard to find,” and “Shipping timeline wasn’t clear.”

However, whenever you can, put direct quotes into the grid, such as: “Why do I have to fill this out again? It feels redundant.” Reviewing feedback written in the first person promotes empathy. And insert the feedback in the appropriate section as soon as possible. So, if a user says, “It would be great if I could log in using Google,” you’d immediately place that note in the Ideas quadrant, not under Criticisms.

Encourage the team to participate, too; it’s a team tool, so everyone should feel invited to contribute.

In this video, Alan Dix, Author of the bestselling book “Human-Computer Interaction” and Director of the Computational Foundry at Swansea University, explains how iterative prototyping helps you spot problems early so you can capture accurate feedback as users interact with your design.

Transcript

Step 4: Group Similar Comments

After the session, look at the feedback in each quadrant. Group similar items together and watch out for these sorts of issues: “Are users struggling with the same feature?” or “Are multiple people asking the same question?”

Clustering feedback helps you see patterns and surface high-impact issues.

Step 5: Prioritize and Plan

Once you’ve grouped feedback, it’s time to:

  • Identify what’s urgent or easy to fix.

  • Tag feedback by impact or feasibility.

  • Create action items and assign them to the right people.

For example, you might notice three users struggled to find the “Next” button on a mobile screen. That’s both frequent and easy to resolve with layout tweaks, so flag it for immediate action.

When you turn sticky notes into backlog items, Jira tickets, or design tasks, you’ve moved from collection to action.

Step 6: Summarize and Share

Before you move on, write a brief summary of:

  • What were the top three insights? For example: “Users liked the visual design of the dashboard. The profile setup process confused 4 out of 6 users. Everyone suggested adding export options for reports.”

  • What decisions are you making based on them? For example, “We’ll simplify the profile setup flow by reducing required fields. We’ll add tooltips to explain dashboard metrics. We’ll make export functionality a priority in the next sprint.”

  • What are the next steps? For example, “Design revised profile flow (due Thursday). Write tooltip copy (due Friday). Add export feature to sprint planning doc for next week.”

Summaries make for handy sharing, so share this with your team and stakeholders so that everyone sees how feedback is driving progress towards a clear and common goal.

Step 7: Revisit and Repeat

Use the feedback capture grid as part of an ongoing process. After implementing changes:

  • Re-test with users.

  • Run another grid session.

  • Compare new feedback to earlier themes.

For example, for Likes you might have: “Much easier now to apply promo codes.” For Criticisms, you might have: “Order summary still not visible until too late.”

Revisiting and repeating is vital as it keeps your design evolving and responsive to real user needs.

Best Practices and Tips for Feedback Capture Grids

Here are a few simple practices to help make your feedback capture grid even more effective:

  • Be consistent: Use the same categories and format across projects.

  • Keep it simple: Four quadrants are usually enough; too many categories can slow things down.

  • Encourage specifics: Push for context and reasons; for example, “I didn’t like it!” isn’t as useful as “The menu was hard to find on mobile.”

  • Timebox your sessions: Limit collection and analysis time so your team stays focused; it’s a constraint that can help greatly.

  • Add context: Label your grid with the session date, version tested, and type of participants for easy reference later.

  • Act on what you collect: If feedback goes into the void, people stop sharing it. Always link feedback to visible decisions or actions; it’s a “living” document.

Using feedback capture grids regularly helps you build a stronger feedback culture. You show users and team members that their input is heard, respected, and acted upon, and that you’re a designer who’s pragmatic and focused.

Overall, a feedback capture grid or feedback capture table is a simple but powerful way for you to organize user and stakeholder feedback. It enables you to clearly view what works and what needs work, and gives you a treasure trove of actionable insights. The power of authentic feedback capture makes this a unique tool to help you align teams, communicate decisions, and design experiences grounded in real user needs.

You might be working on a new feature, reviewing a prototype, or planning a sprint; this tool helps you turn what people say into what your team knows is worth building, fixing, and refining. Try using a feedback capture grid in your next session and you may find, if you set a goal, listen closely, sort with care, and take action, you’ll take a fast-track on more solid ground towards designing with users, not just for them.

Questions About Feedback Capture Grids?
We've Got Answers!

Why should I use a feedback capture grid in design projects?

A feedback capture grid helps you and your design team gather, organize, and act on user feedback systematically. It transforms vague reactions into clear categories: what users liked, disliked, questions they had, and new ideas they suggested. This structure reduces bias and helps ensure teams spot patterns quickly.

Using this tool keeps feedback focused, promotes user-centered decisions, and drives continuous improvement. It fosters collaboration, too, since everyone who’s involved, designers, stakeholders, and users, can contribute to a shared understanding. The grid simplifies post-research analysis, saves time, and helps teams move from insight to action with clarity towards meeting (and exceeding) users’ needs.

Explore how to take user needs and build the best understanding of them so you can move towards the best design solutions.

Who should fill out a feedback capture grid: designers, users, or stakeholders?

Designers typically fill out the grid during or immediately after user interviews or testing sessions. However, involving stakeholders, such as product managers, researchers, or developers, adds value, as their perspectives often highlight strategic insights or technical constraints.

While users don’t directly use the grid, their raw feedback fuels it. Teams can gain the most when everyone observing a session contributes their notes into one collective grid. This avoids fragmented feedback and encourages alignment across roles.

Discover how to make the most of user interviews, with our article How to Conduct User Interviews.

What kind of feedback goes in each section of the grid?

The grid has four parts:

  • Positives (Likes): What users liked or found useful.

  • Negatives (Criticisms): What users disliked or struggled with.

  • Questions: Uncertainties users had or things they didn’t understand.

  • Ideas: Suggestions or spontaneous user comments about what could improve.

This simple structure helps you and your team categorize insights quickly without overthinking where each note belongs. For example, a user’s saying “I wish I could undo that” fits under “Ideas,” while “I didn’t know where to click” goes under “Criticisms.” Filled in well, a capture grid of feedback can tell a fascinating story about how users encounter your design.

In this video, William Hudson explains how persona stories replace generic user stories with research-based narratives that better reflect real user behaviors and needs.

Transcript

How much detail should I include in each part of the grid?

Each grid entry should be short, clear, and specific. One sentence often suffices, and write in bullet form and avoid long quotes. Instead of “The user was confused by the navigation and clicked around a lot,” write, “User couldn’t find navigation menu, clicked four times before locating it.” Aim for clarity over completeness.

If you need to, link each note to more detailed documentation elsewhere, like session transcripts or recordings. Sometimes, such as when you’re testing prototypes, users may have more to say about how they liked a feature.

Discover how to make the most of prototyping, with our article Test Your Prototypes: How to Gather Feedback and Maximize Learning.

What’s the best way to introduce the feedback capture grid to a team?

Introduce the grid as a shared tool for collecting structured feedback. Run a brief session to explain its purpose and sections. Show examples of past grids to illustrate how insights turn into action. Encourage each team member to observe sessions and contribute notes.

Emphasize that it’s fine to be brief; getting the feedback down quickly matters more than perfect wording. Use a collaborative digital tool so everyone can access and update the grid in real-time.

Harvest helpful insights about how to work better together, from our article Collaborating with Your Team for Research.

How do I prioritize feedback from the grid for action?

Group similar feedback to identify recurring issues. Then, rank items by frequency, user impact, and alignment with project goals. Use frameworks like the MoSCoW method (Must-have, Should-have, Could-have, Won’t-have) or an impact-effort matrix to help.

Focus first on “must-haves” that block usability or break core tasks. Use team discussions to validate what matters most. Avoid jumping on one-off suggestions unless they reveal a critical flaw you need to address.

Get right into the MoSCoW method to fine-tune your way to better designs.

How do I avoid confirmation bias when reviewing grid feedback?

Share the grid with diverse team members and ask them to highlight what stands out. Mix perspectives to reduce individual bias. Avoid cherry-picking feedback that confirms pre-existing assumptions, too. Instead, seek patterns across sessions and users.

Use verbatim quotes for transparency and back up each note with specific observations. Track surprises, moments that challenged expectations, and give them special attention in reviews.

Consider powerful ways to help overcome confirmation bias and get on the right design track.

How do I organize multiple grids from different sessions or sources?

Assign one grid per session and then compile summaries across all of them. Use consistent categories to compare across grids. Create a master grid or dashboard to highlight the top themes from all sessions.

Tag notes with metadata, such as session number, user type, and task scenario, to trace patterns. You can choose from some effective digital tools to help organize, filter, and visualize feedback at scale.

Expand your exploration of grid use with our article How to Create a Perspective Grid.

What are some common pitfalls to avoid with a feedback capture grid?

Even a great tool can go wrong if you don’t use it with intention, so watch out for these traps:

  • Vague categories: If people don’t know what belongs where, the grid becomes a mess. Define your quadrants clearly.

  • Analysis paralysis: Don’t get stuck trying to perfectly label or prioritize every note. Focus on action, not perfection.

  • Ignoring feedback: If you capture insights but fail to follow through, trust breaks down. Always close the loop.

  • Letting the grid go stale: Archive or clear your grid after each round. Fresh boards keep minds sharp.

What are some recent or highly cited articles about feedback-related subjects in UX design?

Følstad, A. (2017). Users’ design feedback in usability evaluation: a literature review. Human-centric Computing and Information Sciences, 7, Article 19.

This article synthesizes 31 empirical studies investigating what the author terms “users’ design feedback,” feedback from users concerning an interactive system’s suitability, usability problems, and design suggestions. It distinguishes this from interaction data (e.g., logs) and examines how user reflections can complement traditional methodologies. The review highlights that structured capture of user feedback can produce qualitatively different insights and have substantial downstream impact on development. Because it’s open access and widely referenced, it provides a good foundation for understanding how to systematically capture and use user feedback in UX evaluations.

Perrig, S. A., Aeschbach, L. F., Scharowski, N., von Felten, N., Opwis, K., & Brühlmann, F. (2024). Measurement practices in user experience (UX) research: a systematic quantitative literature review. Frontiers in Computer Science, 6, Article 1368860.

This paper examines how UX research currently measures feedback from users, focusing on the prevalence and quality of survey scales and constructs. After reviewing 60 empirical studies (from ACM CHI 20192022), the authors found that many studies lacked rationale for the scales chosen, used single‐use constructs, and often failed to report scale quality. This has implications for how user feedback (especially subjective feedback) is captured, structured, and used to derive actionable insights. Because it focuses on measurement practices and feedback capture rigor, it is highly relevant for work on effectively capturing user feedback in UX research.

Earn a Gift, Answer a Short Quiz!

1
2
3
4
1
2
3
4
Question 1
Question 2
Question 3
Get Your Gift

Question 1

Which of the following correctly describes the four quadrants used in a Feedback Capture Grid?

1 point towards your gift

  • Likes, Criticisms, Questions, Ideas
  • Strengths, Weaknesses, Suggestions, Bugs
  • Pros, Cons, Metrics, Decisions

Question 2

When is the Feedback Capture Grid most commonly used in the design process?

1 point towards your gift

  • During final development to track bugs
  • After user testing sessions to organize and reflect on feedback
  • Before ideation to generate personas

Question 3

How does the Feedback Capture Grid help design teams work more effectively?

1 point towards your gift

  • It replaces the need for user testing by predicting user behavior
  • It forces all feedback into a single priority score
  • It helps teams visualize and discuss feedback in a balanced and organized way

Learn More About Feedback Capture Grids

Make learning as easy as watching Netflix: Learn more about Feedback Capture Grids by taking the online IxDF Course Design Thinking: The Ultimate Guide.

Why? Because design skills make you valuable. In any job. Any industry.

In This Course, You'll

  • Get excited to learn one of the most powerful problem-solving methods in the world. Design thinking is how you turn messy, ill-defined problems into products and services people love. It's how Apple entered the crowded MP3 player market and redefined the industry with the iPod. It's how Airbnb went from near-bankruptcy to an $86.5B market debut. Whatever your role, design thinking gives you a clear, structured way to solve real-world problems, from everyday challenges like launching a product or improving a service to complex, societal problems like sustainability or healthcare access. And as AI handles more of the routine work, your ability to frame the right problem, understand people in context, and turn raw data into testable ideas will matter even more. Whether you want to land your first design role, raise the quality of the work you deliver every day, or step into leadership, this course gives you the toolkit to get there. No previous design experience required.

  • Make yourself invaluable when you learn the methods to empathize deeply with your users, ideate, prototype, test and iterate to solve complex problems. These are timeless, human-centered design skills you can use in any role across all industries. Research from Forrester found that 3 out of 4 design thinking projects at least double their investment, with a median ROI of 229% per project. In this course, you'll bring structure to your empathy, intuition, creativity, and problem-solving skills with the five stages of design thinking: Empathize, Define, Ideate, Prototype, and Test. You'll learn research and empathy techniques such as user interviews, the 5 Whys, and the What-How-Why method. Your team will stay focused and aligned with synthesis tools like affinity diagrams, personas, and empathy maps. And you'll apply ideation methods like brainstorming, SCAMPER, and Worst Possible Idea to generate solutions you can validate before you invest in building them. You'll know when to use each method and why, and apply them immediately to your daily work with downloadable templates, including interview guides and "How Might We" sessions, ready to use on your next big project.

  • Gain confidence and credibility as you run effective workshops, back your decisions with evidence, and get buy-in from stakeholders. You'll map influence and interest across your stakeholder group, write Point of View statements to frame the design challenge around real user needs, and use prototypes to test your ideas before committing to a full build. These are the same methods IBM, Google, and other major companies use to innovate and turn rough ideas into successful products. You'll learn that design thinking isn't just a set of techniques. It's a way of caring about people that puts empathy at the heart of every solution you design.

  • Craft a personal portfolio with optional hands-on activities. You'll interview real participants, design cultural probes, and map their behaviors. Then, with your problem defined, you'll ideate solutions, storyboard the user journey, and paper-prototype an app interface ready to test on users. You'll finish with a complete case study that shows how you approach a problem, what you learn from users, and how your ideas evolve through the design thinking process. By the end of this course, you'll have the design thinking skills you need to drive your long-term career growth and create solutions people genuinely need and want.

Learn From Industry Leaders

Master complex skills with proven best practices and toolkits directly from industry leaders. Meet your experts for this course:

  • Don Norman: Father of User Experience (UX) Design, author of the legendary book “The Design of Everyday Things,” and co-founder of the Nielsen Norman Group.

  • Alan Dix: Author of the bestselling book “Human-Computer Interaction” and Director of the Computational Foundry at Swansea University.

  • Mike Rohde: Experience and Interface Designer, author of the bestselling “The Sketchnote Handbook.”

Earn Industry-Recognized Certificates

Industry giants trust our courses to train their teams, and prestigious universities integrate our content into their curricula. Add your certificates to your LinkedIn profile, résumé, and job applications.

Our clients: IBM, Harvard University, University of Cambridge, NASA, Adobe, Stanford, Massachusetts Institute of Technology, LinkedIn
Course Certificate

All Free IxDF Articles on Feedback Capture Grids

Read full article
Test Your Prototypes: How to Gather Feedback and Maximize Learning - Article hero image

Test Your Prototypes: How to Gather Feedback and Maximize Learning

Once you’ve built your prototypes, it’s time to gather feedback from your users. It’s essential for you to optimize how you gather feedback, because you not only save time and resources but also learn more from your prototypes and test sessions. So, to help you maximize what you can learn from your

Social shares
1.1k
Published
Read Article

Test Your Prototypes: How to Gather Feedback and Maximize Learning

Test Your Prototypes: How to Gather Feedback and Maximize Learning

Once you’ve built your prototypes, it’s time to gather feedback from your users. It’s essential for you to optimize how you gather feedback, because you not only save time and resources but also learn more from your prototypes and test sessions. So, to help you maximize what you can learn from your tests, we’ll share six best practice tips on how to gather feedback, as well as three methods (with downloadable templates!) on how you can organize your feedback.

Six Best Practice Tips for Gathering Feedback on Your Prototypes

Gathering feedback is a crucial element in the design thinking process as well as all other human-centered design processes. To maximize the benefits of gathering feedback, however, you need to be purposeful about it. Here are some pointers to take note of when you gather feedback from your users.

1. Think of How to Solicit Feedback

How you solicit feedback from your users (or team-mates, if you are doing preliminary tests within your team) depends largely on what type of prototype you have built. For instance, if your prototype is a paper interface, you’ll need to conduct in-person tests with people and guide them through the process of using the prototype to gather feedback. Nevertheless, there are some general rules of thumb you can rely on to solicit better feedback.

First, consider testing several versions of your prototype. This helps to solicit critical feedback, because people tend to hold back on overtly criticizing prototypes. When you present people with alternatives, you allow them to compare the various prototypes and tell you what they liked and disliked about each version, so you will get more honest feedback.

You can also use the “I Like, I Wish, What If” method to solicit honest feedback in test sessions. This method helps your participants to voice their opinions in a critical but positive manner. We will cover more on this method, and provide a downloadable template for it, further down.

2. Test Your Prototypes on the Right People

To get the best results, you need to test on the right people. If you are in the early stages of your design project and just want some simple and rough feedback, it’s good enough to test on your team-mates. However, towards the end of your project, when you create more detailed prototypes, you should test on a representative sample of users to get the most relevant feedback.

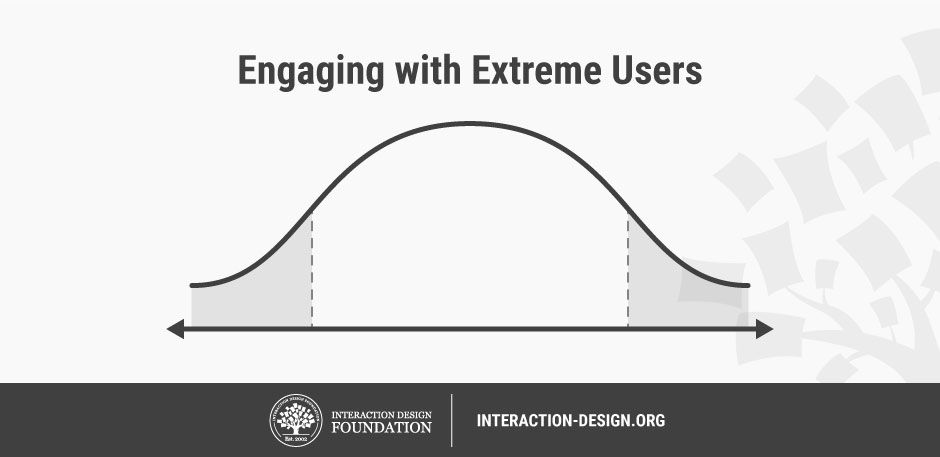
On top of regular users, you can also test on extreme users. This helps you uncover problems that affect regular users, because extreme users tend to be more vocal about their love (or hate) of doing things related to your prototype. To find extreme users, you need to define a dimension relevant to your prototype. If you’re working on an idea related to supermarkets, for example, your extreme users could be parents with 8 children in tow who shop at the supermarket every day, and (on the other end of the scale) remote farmers who might do monthly orders, but only appear in-person at supermarkets perhaps once or twice a year.

Illustration of a bell curve. The extreme users are on each end.

When you test on extreme users, you might gain insightful feedback.

© Teo Yu Siang and the Interaction Design Foundation, CC BY-NC-SA 3.0.

If your product or service serves an international audience, you should also test your prototypes across regions and countries. Different cultures and customs might affect how people use your prototype.

You should also get feedback on your prototypes at various stages from stakeholders other than your users. Internal stakeholders, manufacturers, retailers and distributors each have their own criteria for building, making or shipping your product, and can have an impact on your solution’s success. When you gather feedback from these stakeholders, you’ll prevent your team from receiving a nasty shock when you realize that you can’t implement the product as feasibly as you had believed.

3. Ask the Right Questions

Each prototype that you test should answer a few core questions. Before you test your prototypes, you should therefore figure out what exactly you want to test. For example, if you want to assess your product’s usability, then you should create tasks for participants to complete to test how easy your solution is to use. Subsequently, in a post-testing interview with each participant, you should focus on positive and negative feedback relating to usability.

At the same time, keep an open mind when you test your prototypes, even though you have a few questions you want to answer. Many times, test sessions can reveal key points on issues that your team did not even know to focus on. After testing, you should evaluate the feedback and decide if there are new questions that you should ask during future test sessions.

4. Be Neutral When You Present Your Ideas

When you present your prototypes to your participants, be as objective as you can. Refrain from trying to sell your idea. Remember that the goal of prototyping and testing is to find ways to improve your idea. When you over-sell your idea, you’re likely to reduce the likelihood of receiving accurate feedback.

Refrain from defending your prototype when your participants voice negative feedback. Instead, probe them further to find out what exactly is wrong with your solution. Don’t get too attached to your idea, and always be ready to dismantle, change or even abandon it when you need to. Remember, this stage is like a rehearsal, not the real “show”; you’re not being cut to pieces in the marketplace—in fact, when you make careful corrections that stem from negative feedback, you’ll greatly help your chances of success later on.

5. Adapt While You Test

Adopt a flexible mindset when you test your prototypes. For instance, if you realize that participants keep getting distracted by a nonessential part of your prototype, you can remove it to bring the focus back to the key elements of your prototype. Also, if you think your script for the test session does not work well, feel free to deviate from it to get the best feedback from your participants.

Even though you should adapt while you test, be aware that you shouldn’t change things up with every test session. Be flexible—within reason. After all, you need to perform the same test on multiple participants to get an accurate picture of how well your prototype works with the average participant. If you change things up in every test—for example, if you change your prototype or your script in each test—you’ll find it difficult to compare the results of different test sessions.

6. Let Your Participants Contribute Ideas

During your test session, allow your participants to contribute ideas to improve your prototype. You can ask your participants how the product or service could be improved, for example. Doing so would encourage participants to provide useful critiques as well as help improve your solution.

You can also turn some questions that your participants ask during the tests around—and ask them what they think. For example, if your participant asks you how to charge an electronic device, turn it around to ask them what they think would be the best charging method for the product. Even if you don’t adopt their ideas, you’ll get some insight about their key areas of concern.

You can download our guidelines in this template: “Six Best Practice Tips for Gathering Feedback on Your Prototypes”!

Advance Your Career With This Free Template for “Gathering Feedback on Your Prototypes”
Gathering Feedback on Your Prototypes
Optional
Optional
We respect your privacy
Get 1 powerful email each week: Learn Design and AI From the Best.

3 Methods to Maximize What You Learn from Tests

Usability tests are an art as much as they are a science. After all, most people are not familiar with how to provide feedback in the best way. Thankfully, you can use a few methods to give some structure and organization to your feedback-gathering process.

1. Feedback Capture Grid

Illustration of a feedback capture grid. It's a 2 by 2 grid with Likes, Criticisms, Questions, and Ideas.

© Teo Yu Siang and the Interaction Design Foundation, CC BY-NC-SA 3.0.

A feedback capture grid allows you to organize feedback in a structured way. You can use it during the test to capture feedback from your participants systematically, or after the test to organize the feedback you’ve gathered.

To get started, divide a sheet of paper into four quadrants. Label the top-left quadrant “Likes”—this is where you’ll note down positive feedback. The top-right quadrant is “Criticisms”, where you’ll capture negative feedback and criticisms. On the bottom-left quadrant is “Questions”, where you’ll write down questions that the participants have asked as well as new questions the test session raised. Lastly, the bottom-right quadrant is “Ideas”, where you’ll take down ideas that the test session had sparked.

Make sure each quadrant has at least a few notes. When you use the grid during a test session, for instance, you can steer the conversation towards quadrants that don’t have enough input.

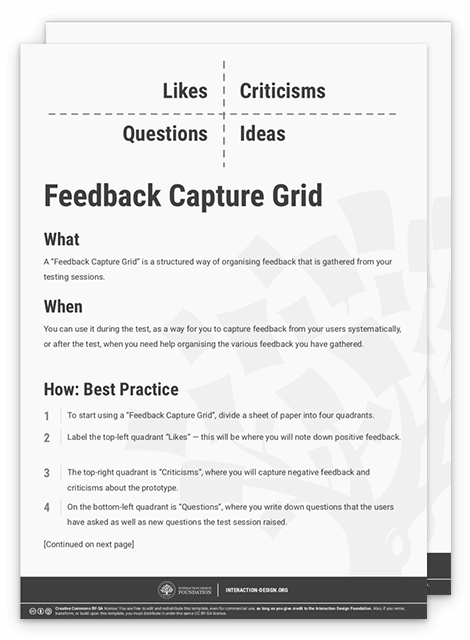
To get help you get started, we’ve created a template on how to use the feedback capture grid method:

Advance Your Career With This Free Template for “Feedback Capture Grid”
Feedback Capture Grid
Optional
Optional
We respect your privacy
Get 1 powerful email each week: Learn Design and AI From the Best.

2. I Like, I Wish, What If

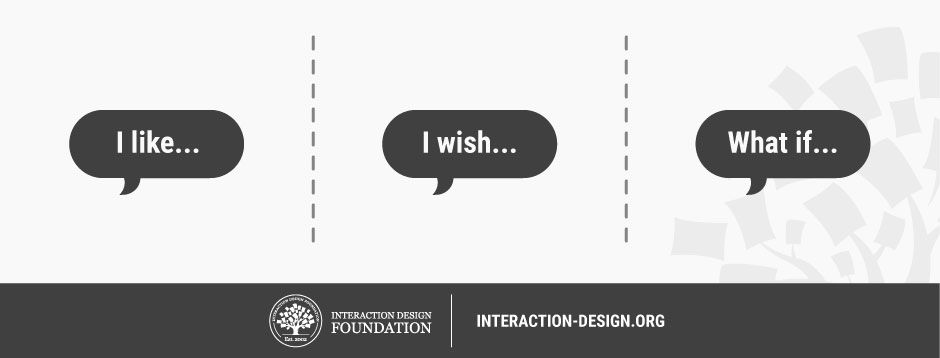
Illustration of three sections: I like, I wish, and What if.

© Teo Yu Siang and the Interaction Design Foundation, CC BY-NC-SA 3.0.

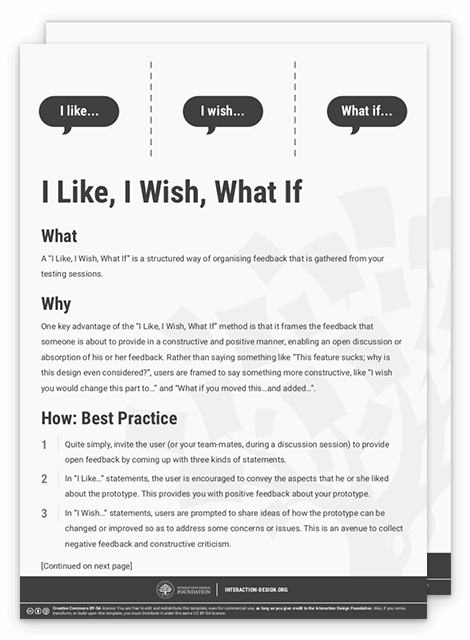
“I Like, I Wish, What If” helps you gather feedback in a structured way. This is useful when your participants don’t have much experience with giving constructive critique. Quite simply, the “I Like, I Wish, What If” method invites the participant (or your team-mates, during a discussion session) to provide open feedback by coming up with three kinds of statements:

  • In “I Like…” statements, encourage your participants to convey aspects that they liked about the prototype. This provides you with positive feedback about your prototype.

  • In “I Wish…” statements, prompt participants to share ideas of how the prototype can be changed or improved to address their concerns. This is an avenue to collect negative feedback and constructive criticism.

  • Lastly, in “What If…” statements, ask participants to express new suggestions that might not have a direct link to the prototype. This opens up possibilities for new ideas that your team can then explore in future iterations of prototypes.

One key advantage of this method is that it frames participants’ feedback in a constructive and positive manner. This lets you openly discuss and absorb their feedback. Rather than prompt participants to say, “This feature sucks! Why did you design it like that?”, you help them say something more constructive, like “I wish you would change this part to…” and “What if you moved this…and added…”.

Please feel free to download and print our template for the “I Like, I Wish, What If” method:

Advance Your Career With This Free Template for “I Like, I Wish, What If”
I Like, I Wish, What If
Optional
Optional
We respect your privacy
Get 1 powerful email each week: Learn Design and AI From the Best.

3. Sharing Inspiring Stories

Illustration of Sharing Inspiring Stories with a conversation bubble with wireframes inside the bubble.

© Teo Yu Siang and the Interaction Design Foundation, CC BY-NC-SA 3.0.

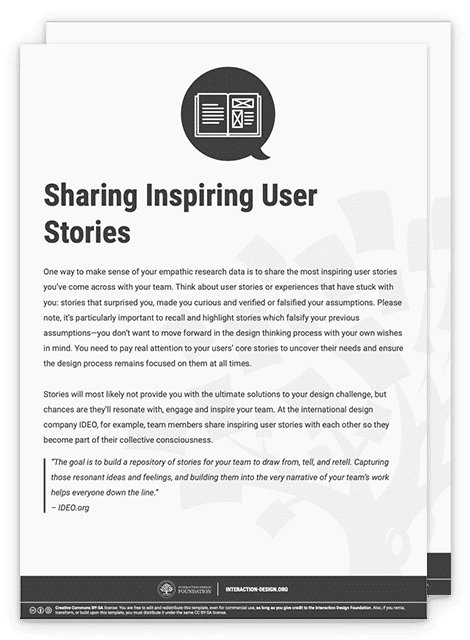
Stories are powerful tools that you can use to inspire yourself and your team. After you’ve done a round of tests with your prototypes, get together with your team and share inspiring stories with one another. When you capture what resonates with you and your team-mates, you’ll help identify ideas and feelings that your team can work on when they think of new solutions.

Here’s how you can build on the power of stories to help you absorb and organize your tests. One by one, you and your team-mates share a couple of interesting and inspiring stories you have observed while testing the prototype. Be as detailed as possible, and take down notes and observations about the stories on Post-its. Put up all the Post-it notes on a wall. You can then examine the stories you’ve shared and look for common threads and possible insights about your users and translate the inspiring stories into actionable next steps for the project.

To help you and your team get started, you can download our template for “Sharing Inspiring Stories”.

Advance Your Career With This Free Template for “Sharing Inspiring User Stories”
Sharing Inspiring User Stories
Optional
Optional
We respect your privacy
Get 1 powerful email each week: Learn Design and AI From the Best.

Build, Gather Feedback, Iterate

It’s useless to absorb feedback if you don’t put the new information into use in the next iterations of your prototypes. Given that, you need to develop a habit with your team to actively integrate what you have learnt back into your process, and consciously develop new iterations of your solutions as you move forward.

You can conduct a post-feedback discussion with your team to achieve this.

  • First, use the “Feedback Capture Grid”, “I Like, I Wish, What If” or “Sharing Inspiring Stories” method to gather and share the lessons you have learned with your team.

  • Next, discuss how to synthesize the feedback you have received. You can, for example, start a brainstorming session to generate ideas to integrate the feedback collected into your prototypes.

  • Finally, go out there and create your next prototypes. Have a bias towards action! Keep iterating your prototypes by constantly testing and integrating your findings, and eventually you will reach an optimal solution that addresses most of the key areas of your user needs.

The Take Away

It’s exciting to gather feedback on your prototype. To get the most out of your test sessions, you should optimize the way you gather. We’ve covered six tips for gathering feedback on your prototype:

  1. Think of how to solicit feedback.

  2. Test your prototypes on the right people.

  3. Ask the right questions.

  4. Be neutral when you present your ideas.

  5. Adapt while you test.

  6. Let your participants contribute ideas.

We’ve also introduced three methods for getting honest feedback: “Feedback Capture Grid”, “I Like, I Wish, What If” and “Sharing Inspiring Stories”. That way, you can maximize how much you learn from testing your prototypes. Lastly, make it a habit to use the feedback you have gathered to build new and improved prototypes—and keep working on that iterative process to move towards your final product or service.

Images

Hero Image: © Teo Yu Siang and the Interaction Design Foundation, CC BY-NC-SA 3.0.

39% of Today's Skills Will Change by 2030

The World Economic Forum expects 39% of today's skills to be transformed or become outdated by 2030.

The good news is that jobs in UX / UI design and AI are among the fastest-growing professions globally.

Build Skills That Keep You Relevant

Privacy Settings

By using this site, you accept our Cookie Policy and Terms of Use.
Customize
Accept all

Be the One Who Inspires

People remember who shares great ideas.

Share on:

Academic Credibility — On Autopilot

Don't waste time googling citation formats. Just copy, paste and look legit in seconds.